The Preferred prize module is in BETA testing now, so please don’t use it for any serious drawings until we fix any bugs.
In the standard mode, RandomPicker assigns prizes to participants on a random basis – everybody can win anything. But what if you want to let participants decide which prizes they prefer?
Preferred prizes is a new type of drawing where every participant gets several tickets and spreads them out among one or multiple prizes according to his/her preference.
For example, imagine you organized an annual raffle for your 100 employees, and that they could win the following prizes:
- 1x trip to Paris
- 5x wellness vouchers
- 5x tickets to ZOO
- 5x book vouchers
All employees got 10 tickets from you and they could put each ticket into a drawing for different prizes. They could then choose how many tickets they allocate for each prize. And of course, they could allocate all their tickets into one prize if they wanted to.
If this drawing was done the old fashioned way, people would get printed tickets with their names or numbers and put them into different buckets. RandomPicker offers the same mechanics for digital online drawings.
How to set up the Preferred Prizes drawing?
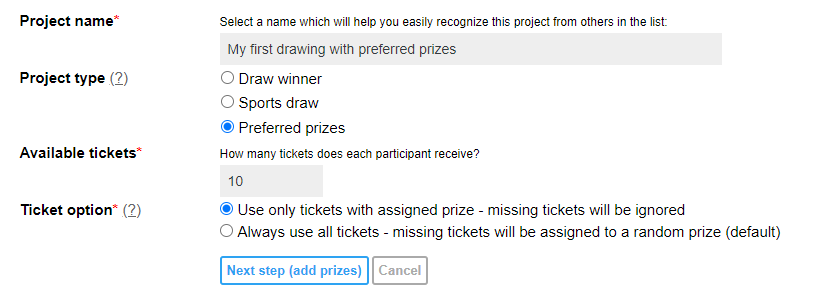
Create a new project and choose the ‘Preferred prizes‘ project type. Then, enter the number of tickets that every participant gets.

Ticket option: When a participant allocates a ticket to a specific prize, it will be used only for the drawing of that prize. There may be situations where a participant doesn’t use all of their tickets. How does RandomPicker process them?
a) Use only tickets allocated to prizes – in this mode, the platform will leave out the tickets that were not allocated to any prize. These tickets will be excluded from the drawings. We recommend using this mode for most drawings because it’s very transparent.
b) Always use all tickets – in some special situations, you may want the platform to not ignore the unused tickets. In this case, the platform randomly assigns the unused tickets to a prize and includes it in the drawing for that prize. This is done for all the missing tickets for all participants. Please be aware that this mode can lead to some confusing situations: for example, someone may win a prize that no one has chosen. Or conversely, a prize might be won by someone who didn’t choose it intentionally. Both situations are methodologically fine, the reason for this result is that the participant did not use all of his tickets and so the system assigned them a prize to them randomly.
How to add prizes?
In the next step, you add prizes and their amount similarly as in the common drawing project.

How to add participants and their tickets?
The entries and tickets can be added in the Entries section. You have several options how to add participants and their tickets into the RandomPicker project:
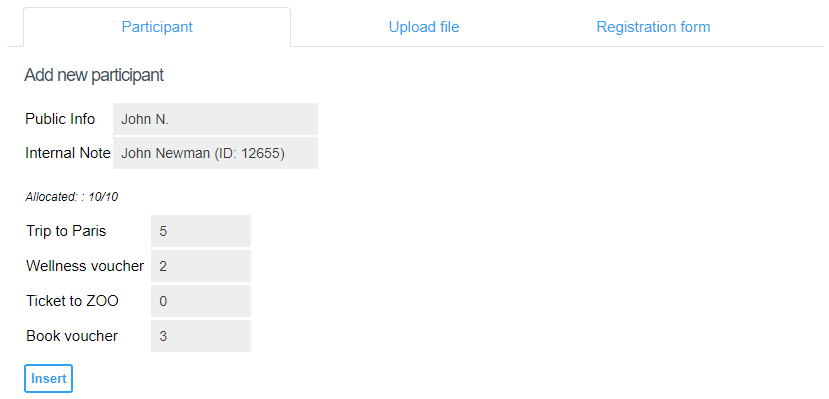
1. Manually add participants one by one – Submit the entry name, optionally your internal note and enter the number of tickets for this participant. The maximum number of tickets you can allocate to each participant is the number you defined in the project settings (10 tickets in our example):

2. Upload participants in an Excel file. Go to the ‘Upload file’ tab, download the excel template and open it on your computer. The template is different for each project.
Don’t delete the columns, they are all necessary for a successful import. All prizes must be added before the import in the Prizes section.
- Column 1 – entry name (public info) – one entry per row.
- Column 2 – internal note. You can leave it blank or use it for your internal note. Do not delete the column even if it is empty.
- Column 3 and the following columns are for tickets. In the header, you can see their name and code – do not change or delete these values. For each participant and each prize, fill in the number of tickets that the participant assigns to this price. The sum of all his tickets should not exceed the maximum number of tickets.
Here is an example of an empty excel template:

File with added tickets:

When the file is ready, save the changes and import the file back to RandomPicker using the Browse or Upload button. After the import, you will see the imported entries in the list of participants.
You can adjust the entries and number of tickets for a specific participant by clicking the Edit button.
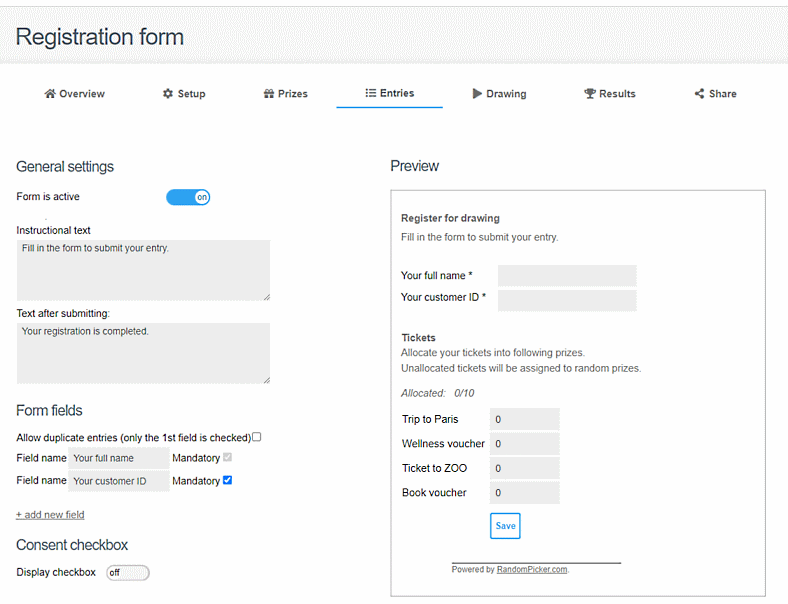
3. You can use the registration form or widget (available in Standard or Advanced plans) – participants will be able to submit their tickets by themselves. In this case, you can invite participants using the online form, or embed the widget form into your website.
To activate the form, go to Entries > Registration form tab and switch the button ‘Form is active’ on and set up the registration form (learn more about the registration form here).
Participants will be able to allocate their tickets between prizes. Again, the more tickets they give to a specific prize, the higher the chances to win that prize.

How to start the drawing?
This step is the same as in the common drawing project. Go to the Drawing tab, and start the test or a final drawing. You will see Winners for all prizes in the Results section.
Questions and answers
Are participants able to submit more tickets than the maximum number specified in project settings?
No. A participant can submit only the maximum number of tickets as defined in the project settings.
What will happen if a participant does not assign all his tickets?
There are two options: the system can ignore unassigned tickets (the default system behavior); or the system can assign the unallocated tickets to random prizes so all the tickets of all participants are used up. You can choose between these two options in the project settings.
Can a participant win multiple prizes in the drawing?
No. One participant can win only once during the drawing, unless they have a duplicate entry (row) in the participant list. In case of duplicate entries (rows) the system thinks there are several independent participants.
Can I use the weights in the Preferred prizes, too?
No. The Preferred prizes don’t use the weights known in the standard drawing type because the weight procedure is replaced by the number of tickets.